Bookbinding For Fancypants
Foreword
To bind a proper book, you'll need tools and materials you probably don't have. Eventually you'll be able to help yourself out with some creativity, but you'll have to figure that part out as we go.In essence
-
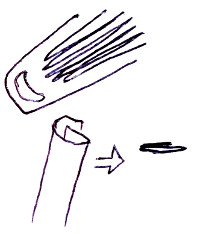
At first, you'll only need thread and needle. There are specific threads that are being used; For simple purposes you would one that doesn't rip too easily/isn't too thin.
Secondly, you'll need specific fabrics and glue. This helps make things more sturdy; And is neccessary when fixing it into hardcover.
Thidly, you'll need cardboard and cardboard cutters. Possibly a press and a hammer. I however won't cover that part here.
Basically
At first you'll need to print the booklets. Programs like Word and Libre Office have settings to print a document in that manner. You thereto have to at first consider into how many booklets you want to split the document; And then print the document accordingly. Then, you need to fold the individual papers - and sort them away into the respective booklets.Optionally you then want to prepare affixiation stripes and and a front and back covering:
Classically the front and back coverings are fixed to the front and back booklets respectively, using a specific cotton fabric and glue. The affixiation stripes are used to tighten the boocklets together - and glued to the respective covers. The covers themselves usually are made of thick paper. You might get away fixing the covers on with duct-tape or something similar. The overlap to the other side of the booklet should however be minimal. Good glue can do wonders. Ultimately the thread will help keeping everything in place - and maybe you'll have to do some experimentation.
Finally - you'll have to make a template.

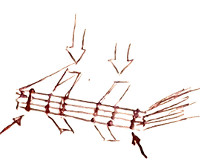
this will be used to jab the holes into the booklets. You will need two holes on the outsides - approximately 1.5 centimeters away from the ends. If you have a book-cutter and you want to use it ... add a few milimeters respectively. Further you'll have to add holes for the affixiation stripes - depending on how many you want to use. If you don't plan on using any - you can be more liberal when it comes to their positioning and the gaps, but you'll - as per the binding technique shown here - have to add them in pairs.
Finally, you may want to jab the holes in first. You need to make sure that they align with the fold. If you have front and back covers, you want to make sure not to harm the cover papers. And then you do as follows:
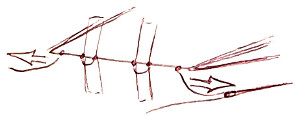
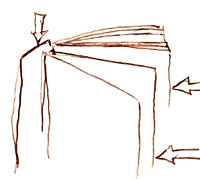
Make sure to pull the thread sideways

Make sure the tread is TIGHT (like a guitar string ... ish). Fixate the entry thread with a double-knot
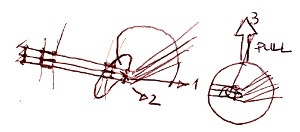
1. pull the exit thread through the gap between the previous two booklets. From the in-side to the out-side. 2. pull the exit thread through the created loop. Make sure the tread is tight TIGHT. 3. Close the knot by pulling up.
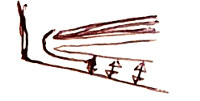
Once the thread is too short - you can add a new one. Just start weaving a new layer, fix the new entry thread to the old exit thread - do the knots as per usual. Doing the connecting knot around the double knot may be a bit fiddly.
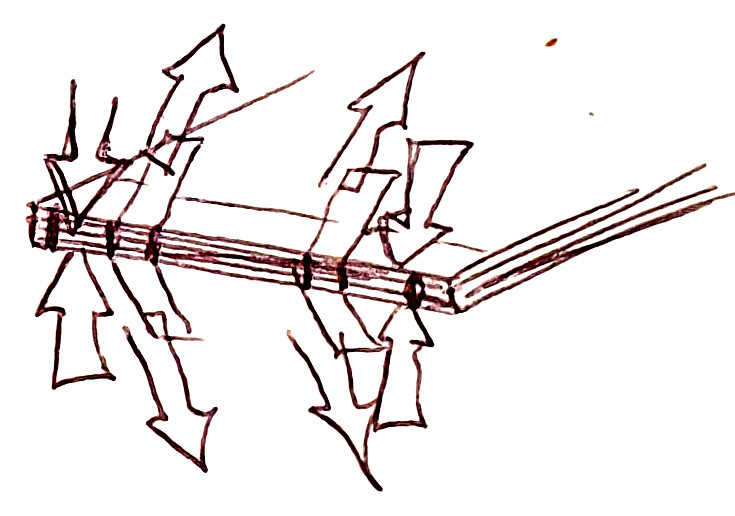
Finally ... pull the affixiation stripes tight and attach them to the front and back respectively.
Additional Info

When at all adding a cover, it may be a good idea to insert a "hinge" of sorts to the back so the backside of the cover doesn't stick to the pages. Usually glued on both sides.